For safe and efficient alcohol distillation, follow this detailed step-by-step process and key precautions:

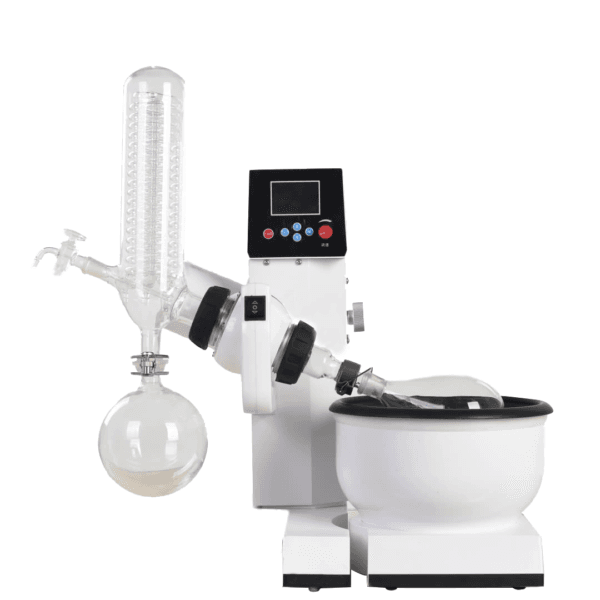
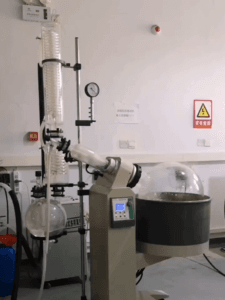
AKRE-2000E Electric Lift Laboratory Vacuum Evaporator
Step 1: Preparation
1. Check the Equipment
- Ensure all parts of the rotary evaporator are intact, including the evaporating flask, condenser, vacuum seals, and receiving flask.
- Verify the cooling system is operational, the condenser is unclogged, and the water bath heater functions correctly.
2. Assemble the Rotary Evaporator
- Follow the equipment manual to properly set up the rotary evaporator:
- Secure the evaporating flask to the rotating head, ensuring a tight fit.
- Use vacuum seals to tightly connect the condenser, evaporating flask, and receiving flask.
- Connect cooling water hoses: the inlet to a cold water source and the outlet to the drainage.
3. Prepare the Solution
- Pour the alcohol solution into the evaporating flask.
- Note: Fill only up to 50% of the flask’s capacity to prevent overflow during evaporation.
4. Test the Vacuum Pump and Cooling System
- Start the cooling water system, ensuring smooth flow through the condenser, with water temperature below 10°C (depending on your lab’s cooling setup).
- Check the vacuum pump to confirm it can quickly reduce system pressure when activated.
Step 2: Set Parameters
1. Water Bath Temperature
- Set the water bath to a temperature between 35°C and 40°C, depending on alcohol’s boiling point.
- Too high a temperature may cause rapid evaporation and solvent loss, while too low reduces efficiency.
2. Rotation Speed
- Adjust the rotation speed to 80-120 RPM.
- Faster rotation increases the liquid’s surface area for better evaporation.
3. Vacuum Level
- Start the vacuum pump and gradually reduce system pressure to enable alcohol to evaporate at a lower-than-normal boiling point.
- Use a vacuum control valve to adjust pressure gradually, preventing sudden drops that may cause “bumping.”
Step 3: Distilling Alcohol
1. Start the Rotary Evaporator
- Submerge the evaporating flask into the water bath, ensuring good contact between the solution and the heated surface.
- Activate the rotation function to ensure continuous mixing of the alcohol solution.
2. Evaporation Process
- Alcohol evaporates under low pressure and heat, with the vapor passing through the condenser and cooling into liquid form in the receiving flask.
- Monitor the process:
- Ensure the condenser is cooling effectively and liquid is collecting in the receiving flask.
- If evaporation is too fast, adjust the water bath temperature or vacuum level.
3. Dynamic Adjustments
- Adjust rotation speed, temperature, or vacuum level as needed, depending on the evaporation progress.
- Prevent splashing or leaks caused by excessive vacuum or overfilled flasks.
Step 4: Completing the Distillation
1. Stop Heating and Rotation
- Once the alcohol solution is mostly evaporated or the desired amount is distilled, turn off the water bath and stop the rotation.
2. Release the Vacuum
- Slowly open the vacuum control valve to release system pressure gradually, avoiding sudden pressure changes that might damage the glassware.
3. Collect the Product
- Carefully remove the receiving flask to collect the distilled alcohol.
- Detach the evaporating flask and clean it with an appropriate solvent to remove any residue.
Key Precautions
1. Safe Handling
- Alcohol is flammable. Avoid open flames and ensure adequate ventilation during the process.
2. Equipment Maintenance
- Clean the evaporating flask, condenser, and receiving flask after each use to prevent contamination and solvent residue buildup.
3. Parameter Control
- Adjust vacuum levels and temperature settings as needed to avoid “bumping” or inefficient evaporation.
4. Cooling Efficiency
- Maintain cooling water temperatures below 10°C to ensure effective condensation of alcohol vapors.
By following these precise controls and standardized operations, a rotary evaporator can efficiently and safely distill alcohol while minimizing solvent loss and energy consumption.
Recommended Product: AKRE-2000E Electric Lift Laboratory Vacuum Evaporator
For efficient alcohol distillation, we recommend the AKRE-2000E Electric Lift Laboratory Vacuum Evaporator. This device is an ideal choice for laboratory distillation tasks due to its outstanding performance and user-friendly design.
Product Features:
- Electric Lift Design: Equipped with an intelligent electric lift system, allowing easy and precise adjustment of the evaporating flask height.
- High-Efficiency Condensation System: Dual condenser design ensures improved cooling efficiency, enabling rapid condensation of alcohol vapor and reducing solvent loss.
- Precise Temperature Control: Digital water bath heating system with precise temperature control (ambient to 99°C) to meet diverse experimental needs.
- Powerful Vacuum Performance: Paired with a vacuum pump, it creates a stable low-pressure environment to speed up evaporation, suitable for recovering various volatile solvents.
- Safety and Reliability: Features explosion-proof functionality and overheat protection for safer handling, especially for flammable solvents like alcohol.
- Premium Materials: Made with corrosion-resistant high-borosilicate glass and PTFE sealing rings for long-term reliability and durability.
Technical Specifications:
- Evaporating Flask Capacity: 20L
- Water Bath Temperature Range: Ambient to 99°C
- Vacuum Degree: Up to 133 Pa
- Rotational Speed Range: 20-120 RPM
- Condensation Area: 1.5 m²
- Lifting Mechanism: Electric lift with a stroke of 0-150 mm
Applications:
The AKRE-2000E is suitable for the distillation, concentration, and recovery of various solvents in the laboratory, particularly for the efficient purification and separation of volatile solvents like alcohol, ether, and acetone.
Choose the AKRE-2000E Electric Lift Laboratory Vacuum Evaporator to make your laboratory distillation operations more efficient, safe, and convenient. If you’re interested in learning more, feel free to contact our technical support team to create a professional plan tailored for you!


