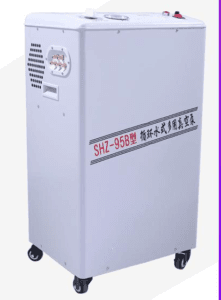
The automatic lifting rotary evaporator uses large-capacity, wide-mouth evaporation bottles combined with an automatic lifting function to meet production requirements of varying heights. Through the frequency control system and temperature control system, the instrument’s performance remains stable. Its high-efficiency condenser design increases the condensation area and enhances evaporation efficiency. It is widely used in industries such as chemicals, pharmaceuticals, and food processing, providing an ideal solution for sample concentration, drying, extraction, and recovery in both laboratories and production environments.
Correct installation is a key step to ensuring the normal operation and efficient performance of the automatic lifting rotary evaporator. Below are the detailed steps for proper installation:
- Choose a Suitable Location: First, select a flat, sturdy, and well-ventilated site to place the equipment, ensuring stable operation and easy future maintenance.
- Check Accessories: Before installation, carefully check that all accessories are complete and ensure no parts are damaged or missing.
- Assemble the Main Structure: Follow the instructions or diagrams to assemble the main structural components such as the base and frame, ensuring that all connections are secure.
- Install the Heating System: Based on the equipment requirements, install the heating system in the appropriate location, including heating tubes and temperature sensors, and connect the power supply.
- Connect the Condensing System: Attach the condenser pipes to the main structure and connect them to the refrigeration unit (if applicable), ensuring the condenser system can function properly.
- Set Control Parameters: Adjust the parameters on the control panel such as temperature and pressure according to the operation manual, and perform pre-start checks and adjustments.
- Connect the Supply Lines: Attach the required piping to the inlet and outlet to ensure smooth flow without blockages, facilitating an efficient concentration process.
- Check the Sealing Performance: Carefully inspect all seals and gaskets for integrity. Before starting the machine, make sure there are no air or liquid leaks.
- Electrical Connections and Testing: Perform electrical wiring, confirming that all circuits are properly connected and conduct preliminary tests to ensure all functional modules are working correctly.
- Startup and Commissioning: After completing the above steps, start the machine and observe its operation. Adjust parameters as needed until the desired performance is achieved.
- Document the Installation: Record and archive the entire installation process to provide reference material for any future troubleshooting.
By following these organized and detailed steps, you can ensure a smooth and proper installation of the automatic lifting rotary evaporator, which will help it perform effectively in production. If you encounter any uncertainties or issues requiring professional expertise, be sure to consult a specialist to avoid potential risks and fully leverage the advantages this equipment offers.


